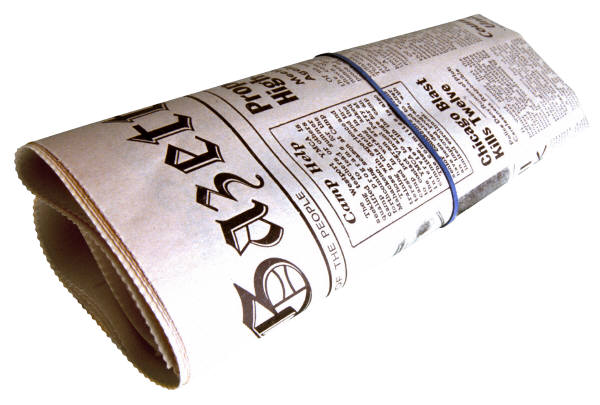
 Put a sheet of newspaper inside your refrigerator and close the door. This works just like baking soda to keep your fridge smelling fresh. Change it as needed, and if you actually read the paper, it’s a freebie freshener!
Fridge Freshener
Reply

Put a sheet of newspaper inside your refrigerator and close the door. This works just like baking soda to keep your fridge smelling fresh. Change it as needed, and if you actually read the paper, it’s a freebie freshener!
Today I decided to refashion a ski sweater that I’ve loved for many years.

give me a moment before I cut this to pieces
For the last year it’s danced between my refashion pile and my closet. Every time that I place it in my refashion pile I regret it and put it back in the closet. The thing is, I never actually wear it anymore. Today is the day that I admit that I’m never going to wear this sweater again. I still love the print (or mix of prints) but it’s tragically outdated and I know that once I get past the first cut I’ll be glad I did this.

Step 1: no more sleeves
This refashion is an easy and probably pretty obvious one – leg warmers.
A couple of zig-zags later and I’m sporting a new pair of leg warmers.

gotta luv a good leg warmer
Stay tuned for Part 2 of this ski sweater refashion. It’s a surprise twist for sure.
Curtain rings with clips attached to them can be used as combo napkin rings and place cards. Clip your guests’ names to the clips, slip napkins through the rings and now your guests will know where to sit.
Stitch a curtain ring to a corner of your potholder and you now have a pretty way to hang your potholder.

Because shower curtain rings have a way to open them they can be used to:

keep your hairbands together

organize jewelry

organize nuts, washers and other tools

another way to organize jewelry

keep handbags free from creases
You can also use them to:


Go to I Am Mama Hear Me Roar for her tutorial on how to turn curtain rings into a nursing shield. Brilliant!
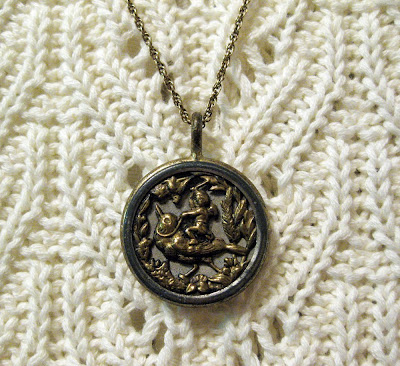
Cathe over at Just Something I Made came up with this beautiful pendant made from a vintage button and vintage curtain ring. I love this but I could also see just stringing the curtain ring on a chain and leaving it at that.
This post is a rescue refashion. A bit of fabric rescued from the scrap pile of another refashion.
When I was in Michigan I stopped by one of my favorite refashion resources – the Charlotte Goodwill Outlet. We have Goodwill Outlets in Orange County but they are not as good as this one. I always find really good sweaters and this time after doing my first run through – where I through everything that I remotely like into my cart – while I was editing my finds I noticed that I had lots of off-white sweaters and tan sweaters. Light bulb moment! I can always use comfy sweaters when I’m in Michigan so why not combine these sweaters and make an off-white poncho and a tan poncho.

comfy but not wearable (yet)
I haven’t yet finished either poncho. What you see below is what’s leftover after blocking out and cutting the tan poncho. I had intended to toss the remains aside, maybe to be cut up into potholders or pillow covers but when I popped it onto my dress form I saw the makings of a smaller poncho than the two I was working on. This would be a nice poncho to take back to California.

cashmere leftovers - you heard me right CASHMERE!
Before we go any further, let’s do a rewind. When I was planning out my original ponchos I used scissors to cut away the seams from the wrist ribbing all the way up the sleeve and down the side of sweater. Then I cut away chunks of the sweater which included the ribbing from the bottom of the sweater and the sleeves. What I ended up with was a poncho with a lot of right angles that doesn’t have the same line in the back as it does in the front but it works.

snip - snip

post seam surgery
Did you notice how I folded up the end of the white sweater? I thought it would make a nice kangaroo pocket. It would, but I didn’t end up going in that direction after all – but that’s another story altogether.
Back to the tan poncho. When I originally cut it up I was trying to get as much of the ribbing from the sleeves and the bottom as possible to use on the larger tan poncho I was creating, which left me with the smaller poncho above with a very different shape than I would have planned. But I liked it. Apart from some very jagged edges, I could take it off my dress form and call it done, but it didn’t feel finished to me. I decided that I wanted some sort of trim along the bottom edge. I took a field trip to Joanne’s Fabrics but couldn’t find anything that would work and besides I really don’t like buying new items to make my refashions work. I prefer to raid my own stash or go on a garage sale safari. After a good stash pile rummage I found this t-shirt that looked to be a good candidate. I had originally envisioned a lush fringe but since I didn’t have any fringe in my stash I think this t-shirt will do fine. More than fine. It looks as if it was made to go with the color of this sweater!

I think it's a match!
Starting at the bottom of the t-shirt I used my rotary cutter to cut 3 inch wide strips, then sewed them together into one long strip until I had enough to edge my poncho.

ready for a future refashion 🙂
Luckily this was a tunic length t-shirt so I’ll be using the leftover top for another refashion.
I pinned the t-shirt strip to the poncho with the right sides together and zig-zagged everything together being careful not to pull as I stitched so that the seams wouldn’t be stretched out and ruffly. I also used this as an opportunity to fix the ragged cuts that I had made in the poncho since I hadn’t been concerned when I first made the cuts that I would need the rest of the sweater for another project.

ziz-zag seam closeup
I liked the poncho but felt like I wanted to jazz up the trim a bit. I first tried a twisted rolled hem.

hmmmm - don't think so
Then I tried just folding the trim under to create a finished edge.

hmmmm - not loving it
Okay, so I’m going to leave the edge unfinished, but I can’t quite call it done yet. The trim bunches up at the sharp angles on this poncho.

hmmmm - what's wrong with this picture?
An easy fix though. Just cut through the trim from the corner straight back to the end of the width of the trim.

getting better

just checkin'
If I had thought it through I would have mitered the corners, but since that’s not an option now I added some buttons at the corners just to give it a little more detail.

button #1

button #2
I won’t show you button #3 and #4 but let it be known that they are the same size as the first two buttons with a slightly different coloring and embossed design. I like it like that. I don’t think something needs to be perfectly symmetrical to feel balanced.
")
no more lumps and bumps
You can’t see the buttons in this shot but it’s late and I need to schedule this one to post, so you’ll have to trust me that the buttons added just the right little detail to finish it off. I wore this poncho to a wind instruments concert and not only did it dress up my jeans a bit it was nice and cozy as I sat in the cold theater.
Update: I left this poncho in my truck one day and now it’s ready to grab whenever a day turns a little chilly. Since it’s become a favorite of mine I wanted to give you some pics of how it looks on a real body instead of my dress form.

My photographer - the one on the left.

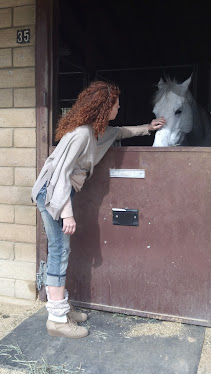

Notice my slouchy socks? They're actually the sleeves of another sweater I used to make another poncho.


Okay, that’s it. I’m done posing. Have a great weekend all!