New Uses for Curtain Rings

Napkin Rings

Curtain rings with clips attached to them can be used as combo napkin rings and place cards. Clip your guests’ names to the clips, slip napkins through the rings and now your guests will know where to sit.

Potholders

Stitch a curtain ring to a corner of your potholder and you now have a pretty way to hang your potholder.

Shop Storage

See? Even something for the guys -storing nuts & washers

Shower Curtain Rings Keep Things Organized

Because shower curtain rings have a way to open them they can be used to:

shower curtain rings for elastic hair band storage

keep your hairbands together

bracelet jewelry organizer made of shower curtain rings

organize jewelry

See? Even something for the guys -storing nuts & washers

organize nuts, washers and other tools

Shower curtain rings for necklace holder.

another way to organize jewelry


Shower curtain rings . . .

keep handbags free from creases


You can also use them to:

  • attach keys to your belt loops
  • attach a plastic or metal mug or thermos to your backpack
  • keep camping utensils together
  • organize items in a drawer
  • keep your loyalty cards together and ready to scan

Curtain Ring Idea Board or Picture Gallery

curtain rings

Nursing Shield

Go to I Am Mama Hear Me Roar for her tutorial on how to turn curtain rings into a nursing shield. Brilliant!

Curtain Ring Pendant

Cathe over at Just Something I Made came up with this beautiful pendant made from a vintage button and vintage curtain ring. I love this but I could also see just stringing the curtain ring on a chain and leaving it at that.

Book Shelves Gone Wild

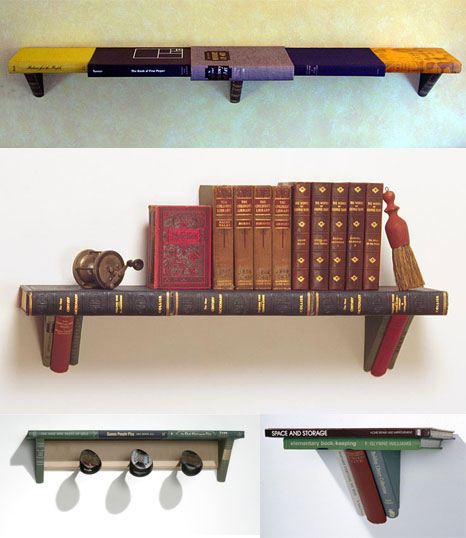
My friend G and I were wandering around The Lab (it’s an industrial chic outdoor mall) after lunch at The Gypsy Den and ended up in this little clothing store “Gloss” that had the most creative displays. Take a look at their books made into shelves that double as jewelry organizers.

Here’s how to construct a floating book shelf:

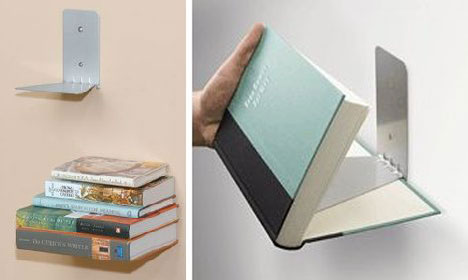
Invisible Bookshelf

from WebUrbanist


Dollhouse Bookcase

This is a dollhouse made from an Ikea bookcase. It’s a fantastic way to salvage a bookshelf that you may not have a use for anymore or which is marred in some way that makes it unsightly as a bookcase. I found this pic while traipsing through Grosgrain Fabulous. It’s worthwhile to click on over there and read her comments and thoughts regarding this dollhouse.

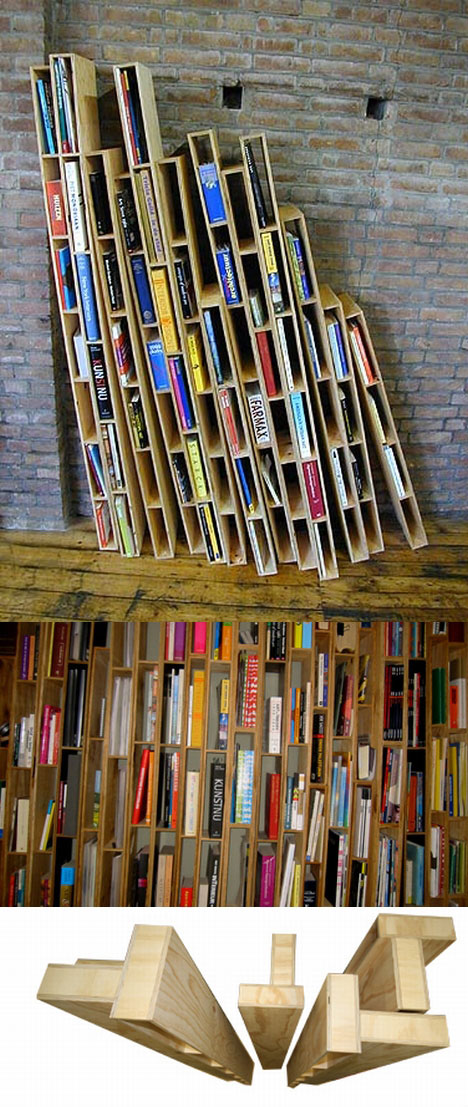
20 Unusually Brilliant Book Shelves

WebUrbanist has put together some wild book shelves which lend themselves to the DIYer with access to a glue gun and a hammer.

Bookshelves Made of Books

And check out these book cases made from books. I’ll call them Cannibal Cases.

Bookcases Made of Books


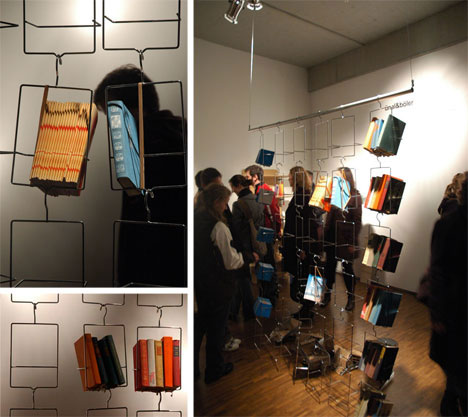
Check out this hanging book case made of – wait for it – HANGERS! You’ll need to incorporate some plier action into your skill set, but it shouldn’t be too difficult. I think this is my favorite simply because it’s so hard to find ways to reuse dry cleaner hangers.

Creative Hanging Bookshelves


Funky Bookcase

I think this one is made from pallets.


If you have a lot of cardboard boxes around, decoupage them (for beauty and strength). Stack them how you like them and secure with 2 straps. This contraption won’t survive an earthquake or a pair of toddlers, but it could work nicely as a room divider.

Elegant Bookcase

And this is just for fun. It doesn’t necessarily use recycled materials but it’s too much fun to not pass on to you all. Oh the possibilities!

created at: 10/20/2010


Free Boot Trees

I just cannot bring myself to buy boot trees. I need them, but my Irish blood won’t let me pay $20 for something that will never leave my closet. But I was tired of my boots toppling over so I made enough boot trees for all of my boots and it didn’t take me longer than 30 minutes to make them all.

I used a box cutter to cut a cardboard box into squares that I could fold into thirds and stand up inside each boot. I didn’t measure anything – just eyeballed it.

First piece of cardboard cut.

There’s already a fold in this piece so I just needed to make two more folds to create a triangular shaped tube. I used a ruler held against the cardboard at the point I wanted to make the fold and then wrapped the cardboard up around the ruler.

Using a ruler to create creases.

Wrap some shipping tape, masking tape or duct tape around each triangle so that it holds it’s shape inside the boot.

Because I don’t like to see the cardboard sticking out of my boots I cut each set of boot trees to just below the top of each boot.

No more toppling boots.

No More Wire Hangers!

I can’t stand wire hangers, nevertheless they still end up accumulating in my closet. The dry cleaners, garage sales and thrift store buys all tend to come with wire hangers. Die-hard recycler that I am I can’t seem to throw them away so I started looking for ways that I could use them to either make my life a little easier (as in the Bottle Dryer tip below) or craft them into something beautiful. Some of these ideas came straight from the old noggin, and some came from surfing the Internet.

Bottle Dryer

To keep water spots from forming on the inside of items with a narrow neck, tape a rag to a straightened out wire hanger and use it to dry the inside of your container.

Bubble Maker

Mix one part dishwashing liquid to two parts water in a large container. Untwist the hanger and stretch it out straight leaving one end bent. Bend the bent section back on itself to make a handle. Bend the long straight section around to make a large hoop. Dip your new bubble-maker into soap solution and wave it gently to create giant bubbles.

Camping

Straighten out one or more hangers. Leave one end curved and doubled back on itself so you have something to hold onto.  Use to roast hot dogs and marshmallows over a campfire.

Christmas Decorations

Using wire cutters cut the long piece of wire away from the curved pieces. Use pliers to shape the wire into stars, hearts, diamonds, circles … whatever shapes you want for your Christmas decorations. Decorate the wire shapes by:

  • painting
  • spray with glue, then shake on glitter
  • wrap with fabric remnants
  • wrap with ribbon, lace or string

Tie ribbons to the top of your new decorations to hang them on your tree, in a window, on a mantle …

Dream Catcher

Bend a hanger into a circle. Wrap it with ribbon or raffia. Construct a web by wrapping ribbon, yarn and/or string across the open section of the hoop. String beads and feathers onto fishing line or heavy duty thread and tie onto your new dream catcher.

Halloween Costumes

Cut, bend, twist and shape hangers into all kinds of accessories for Halloween costumes. Swords, wings, halos and horns are a just a sample of what you can shape and cover with fabric, foil or paper.

Mobile For Baby

Structure of Mobile

You’ll need two wire hangers for this one and if you want to get really creative you can add more layers and use up more hangers.

With a pair of wire cutters cut the long straight portion of each hanger at the point just above where it curves up so that you have two straight rods with a slight curve up at each end.  With a pair of pliers make a loop in the center of one of the rods. Thread the other rod through the loop and bend the loop downwards and twist so that it locks the two rods together. Now use the pliers bend the end of each rod so that it curves back onto the rod creating a closed loop and making sure that there are no sharp edges exposed.

Mobile Design

Decide what you want to hang on your mobile. You can print something onto card stock and cut it out, use small toys, whatever suits you or in the case of a true DIY’er, whatever is laying around the house. Poke a hole in whatever you’re using, thread string, ribbon or fishing line through the hole and tie to the loop at the end of each wire. Tie string, ribbon or fishing line to the center loop to use for hanging your mobile.

Plant Hanger

Cut away curved pieces from 4 hangers. Twist a small loop at the end of each wire. Thread 3 sections onto the 4th section. Wrap the straight piece that all the others pieces are strung onto around a 6″ to 8″ pot just below the lip. Thread one end of the wire through the loop at the end of this wire and then twist the wire back on itself to secure.

Wreath

Cut the straight sections away from the curved sections. Bend one or more pieces of wire into a wreath shape. If using more than one piece of wire, use pliers to make a loop at the end of one wire. Slip the other wire through the loop then make a loop at the end of the second wire and bend it over the other loop to secure. After bending into your wreath shape do the same with the other two ends to hold the wreath together. You can make a single strand wreath or multi-strand wreath (which makes it easier to attach decorations to). Use florists wire to attach holly, evergreen or vines branches to your wreath. Leave as is or continue adding other decorations such as:

  • bows
  • ribbon
  • lace
  • silk flowers and/or leaves
  • small toys